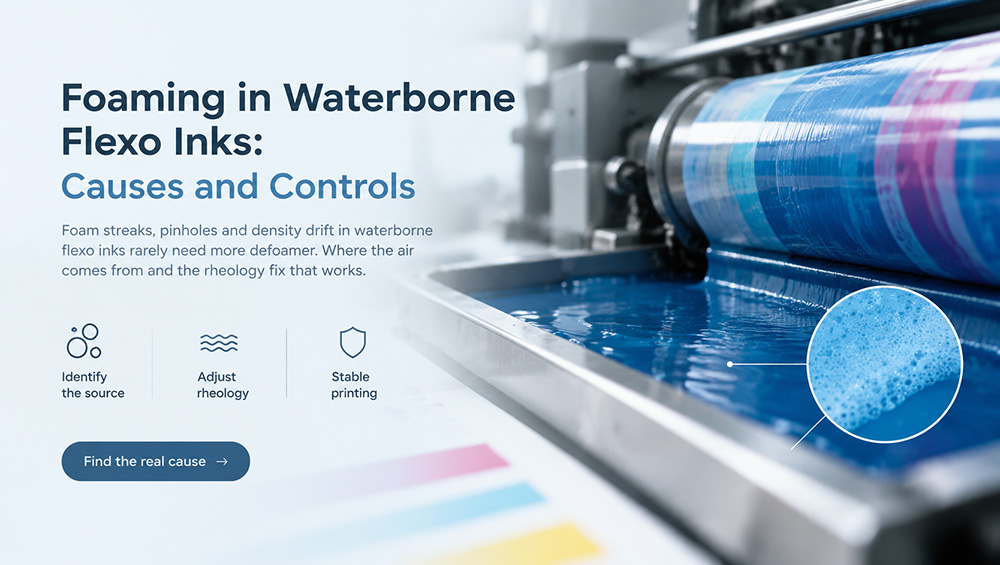
At 300 m/min on a lamination press, a foam problem announces itself: a pale streak down the middle of the web, print density drifting on every impression count, and an operator reaching for the defoamer bucket. That last move is where the day goes wrong. Foaming in waterborne flexo inks is mostly a rheology and handling story, and defoamer treats the least important part of it. We chased this on customer lines through two ink seasons; here is what the air is actually doing and what fixes it.
Where the air comes from
Waterborne inks are built to be amphiphilic — that is what keeps resin particles in water and pigment wetted. The same chemistry that makes the ink stable makes it a superb foam host: the chamber blade and the return flow shear air into the pan continuously, and the surfactant layer keeps each bubble alive. Aeration is not a sign of bad resin; it is physics you have to design around.
Before fixing anything: is it foam?
Shake 100 mL of the ink in a glass jar for ten seconds and watch the column for five minutes. A persistent foam head means entrained air, the subject of this piece. Craters with no foam head are a surface tension or contamination problem — usually silicone transfer from rollers or gloves — and adding defoamer to that failure doubles down on the contaminant. Pinholes only at the edges of solid areas point at bubbles dragged into the film by too much yield value. Three looks, three different fixes. Diagnose before dosing.
The label job that was not foam
A converter running clear varnish on clear PET for a beverage brand called us in July: white specks in the solid, gloss falling from impression to impression, and an ink supplier three weeks deep in a defoamer escalation that had reached 0.8% on total formulation. The jar test on their pan sample produced no foam head at all. The specks were air coming out of solution at the anilox cell walls, because the circulation pump was drawing a vortex and pulling a ribbon of air back into the pan on every pass. A baffle plate and eight centimetres less pan level ended it during one stoppage. We sold nothing on that call, and we tell it for two reasons: escalation on the additive side is the expensive reflex, and a jar test takes ten minutes, usually long enough to tell a chemistry problem from a plumbing one.
Why more defoamer backfires
Defoamers work by being deliberately incompatible — they pierce foam films locally. Push the dose past what the system can carry and you get craters, mottling, adhesion loss under laminating adhesives, and a gloss bill you were not expecting. Our standing practice: hold defoamer at 0.1–0.3% on total formulation, added last, never dosed straight into the grind — and spend the rest of the effort on the viscosity curve.
It starts before the press: grind, let-down, water
Some of the foam we are sent arrives already in the drum. High-speed dispersing shears a column of air into the grind, and whether that air leaves is decided by what happens next. Let-down with hard water is the quiet variable: calcium and magnesium screen the surface charge on the resin particles, the stabilising layer thins, and a dispersion that looked acceptable warm at 40 °C sets a stubborn foam head as the IBC cools overnight. Two habits earn more than any additive in the can: check make-up water below 50 ppm hardness before you blame a batch, and give finished ink a deaeration stand — an hour quiet, overnight if the schedule allows — before it is packed. To see how much air is actually in a batch, weigh 100 mL in a calibrated cup straight after let-down and again after half an hour of rest: density climbing while the level drops is entrained air leaving, and the gap between the two readings is a number worth arguing about, unlike impressions of foam.
The fix nobody expects: steepen the curve
Bubbles escape according to how the ink flows at low shear. Cellulosic thickeners leave a high yield value — a gel-like network that holds every bubble in suspension inside the pan and delivers it to the anilox. Associative polyurethane thickeners build structure through hydrophobe association instead: thick at rest, collapsed under shear, so the bubble network drains and releases air between the pan and the chamber. Swap to a steep-shear-thinning HEUR and the foam column in the jar test collapses without touching the defoamer can. YT-255A low-shear associative HEUR (40% or 50% solids, dosed at 0.5–2.0%, pH-independent) is our first pick where foam release and roller spatter are the complaint. If the job also needs pigment wetting and leveling at higher shear, associative thickener YT-330B (30 ± 1% solids, 20,000–30,000 mPa·s) brings more of both. One honest limitation: associative thickening is temperature-dependent, so a January pan and a July pan want different doses — write it into the batch sheet instead of discovering it at 2 am.
The resin side: viscosity and ion type
Low-viscosity resins entrain less air per unit of shear and let what does get in rise out faster. For ink bodies we point people at cationic aliphatic PUD YT-7012: transparent, 30 ± 2% solids, 50–200 mPa·s, anti-yellowing, built for waterborne inks, heat-transfer and paper treatment. The catch is in the name — cationic. Pair it with anionic pigment pastes or anionic associates and you get flocculation, viscosity crash and a foam problem that looks identical to the one you started with. Check ion compatibility before blaming the defoamer brand.
One limitation belongs in the same breath as the recommendation: above roughly 400 m/min the chamber blade aerates whatever you have formulated, so past that speed the answer is pan pressure, blade clearance and ink temperature control, and no resin supplier can formulate those on your behalf.
On press: the checklist we actually run
- Prime the loop, then let it stand ten minutes before the first meter run — the pan arrives aerated from the mixer.
- Keep ink at a logged, stable temperature; drift in viscosity reads as foam and gets “fixed” with the wrong additive.
- Enclose return flow; splash aeration from an open weir adds air faster than any defoamer removes it.
- Jar test every hour on the press-side sample, not the can from the store.
- Log defoamer dose per batch. “A splash” is not a number.
Symptom to first check
| Symptom | First check | Likely cause |
|---|---|---|
| Pale streaks, density drift | Jar test the pan ink | Entrained air |
| Craters, no foam head | Trace silicone sources | Surface contamination |
| Pinholes at solid edges | Review thickener type and yield | Bubbles dragged into film |
| Foam only on cold mornings | Compare winter/summer dosage | Temperature-dependent association |
| Foam after paste addition | Check ion balance | Cationic/anionic mismatch |
The associative thickener range lists rheology profiles and dosing guidance for every grade, and the waterborne ink application guide maps resins to flexo, gravure and paper-coating roles. Our deeper cut on rheology choices is how to pick an associative thickener, and the YT-255A data sheet carries the full curve. For print-quality targets behind the numbers, the ISO 12647-6 flexo process standard is the reference we cite in disputes.
Send a 500 mL sample of the foaming ink plus your pan temperature log, and ask our application lab for a thickener package tuned to your shear history. A jar test costs ten minutes; a stopped line costs a shift.